
Connect the accounting workflow
Set up Xero and review the connection and sync results.
Xero & payment connections / AxiomBlue
Connect Stripe to offer eligible invoice payments and connect Xero for accounting sync. Review each connection separately so the office can see what was paid and what reached the accounting system.
Set up Xero and review the connection and sync results.
Plan fit: Xero sync and Stripe online payments require Professional. New Stripe merchant onboarding currently supports Australian businesses only. Connected service accounts and any external subscription or processing charges are additional. Compare plans →
A practical workflow / Example
The demo’s Business Settings → Integrations shows the Stripe Payments connection card. Review its status, then check Xero separately in the same settings.
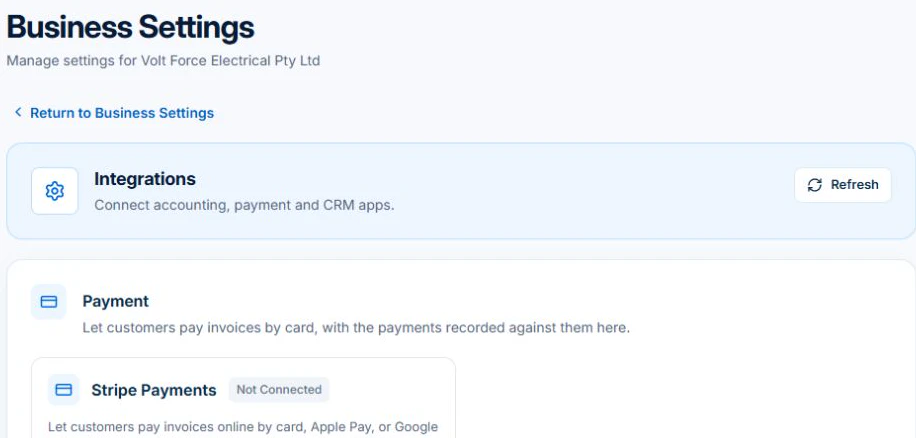
After setup, confirm the payment option from an eligible customer invoice and review Xero sync results separately. Provider accounts and applicable charges are separate.
On Professional, connect Stripe and check whether the invoice is eligible for card payment. Review the invoice and the resulting payment record before following up a customer about an outstanding amount.
Connect Xero for the supported accounting sync and inspect its result separately. A successful payment and a successfully synced record answer different questions. Check each connection when investigating a discrepancy.
Set up Xero and review the connection and sync results.
Connect Stripe so eligible customer invoices can be paid online.
Use connection checks and payment fee reporting when reviewing the setup.
Picture it in your business / Example
Configure Stripe, check the invoice’s customer-facing payment path and review the payment record when funds are recorded.
A practical starting point
Use the relevant integration setup.
Check sync and payment settings for the business.
Check a representative record and its result.
Know what’s included
Xero sync and Stripe online payments require Professional. New Stripe merchant onboarding currently supports Australian businesses only. Connected service accounts and any external subscription or processing charges are additional.
Compare plans, limits and pricing →Check the workflow in detail
Explore the detail
Availability varies with plan, permissions and enabled features. Check plan inclusions.
See how this fits: get paid & keep customers informed →Before you get started
Have a specific workflow in mind? Talk it through with us.
Business Settings → Integrations. Available controls depend on your permissions and enabled features.
Xero sync and Stripe online payments require Professional. New Stripe merchant onboarding currently supports Australian businesses only. Connected service accounts and any external subscription or processing charges are additional.
Try a familiar job, check the records and confirm the plan inclusions your team needs.
Keep the work connected
Considering a switch?
Use a familiar job to compare the way you work today with the way Axiom Blue handles it.
Check the quote, schedule, job record and invoice. Look for the details your team needs.
Compare usage limits, paid seats and specialist features. See plans and pricing →
Try your own quote on the free plan. Before moving existing records, ask us about your data and setup needs.
Make the next step a small one
You know where the friction is in your business. Open the demo and see how AxiomBlue handles it. Then start with your own quote on the free plan.
Free forever for one person. No credit card. Usage limits apply.
Try a quote like one you send every week. Check the detail your customer will see.
Explore a job, its crew, time and materials. Look for the information you usually chase.
Compare the features and limits you need. See plans and inclusions →